Synchronize Google Calendar with Flectra
Synchronize Google Calendar with Flectra to see and manage meetings from both platforms (updates go in both directions). This integration helps organize your schedule so you never miss a meeting.
Setup in Google
Enable Google Calendar API
Begin by creating a new Google API project and enabling the Google Calendar API. Then, go to the Google API Console and log into your Google account.
Note
If this is your first time visiting this page, Google will prompt you to enter a country and agree to the Terms of Service. Select a country from the drop-down list and agree to the ToS.
Next, click Select a project and select or create an API project to store credentials.
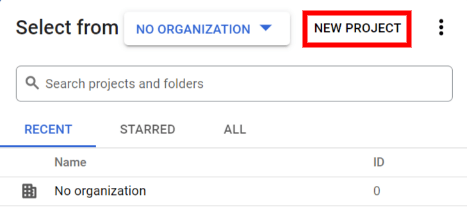
Tip
Give the API Project a clear name like “Flectra Sync” so you can easily find it.
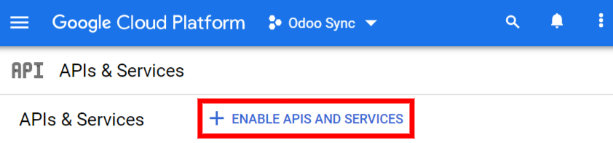
Then, open the API Project and click Enable APIs and Services.
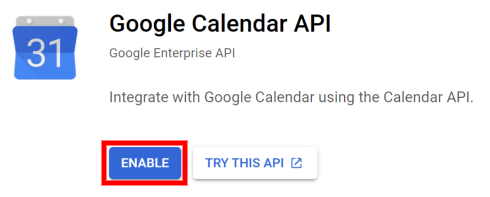
After that, search for Google Calendar API using the search bar and select Google Calendar API from the search results. Click Enable.
Create credentials
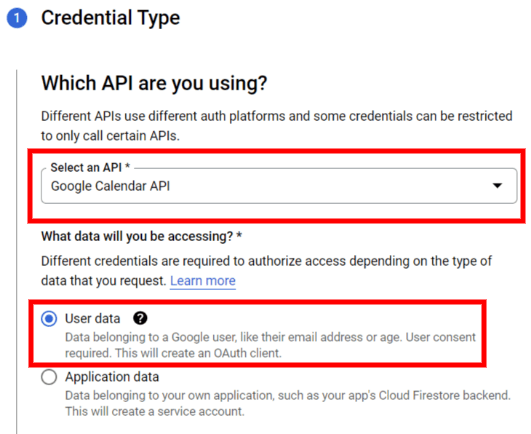
Now that you have created your API project and enabled the Google Calendar API, you need to create credentials. Begin by clicking Create Credentials. Google will then guide you through four steps to create your API credentials.
In the first step, Credential Type, select the Google Calendar API and User Data options. Then, click Next.
In the second step, OAuth Consent Screen, type Flectra in the App name field, select your email address for the User support email field, and type your email address for the Developer contact information section. Then, click Save and Continue.
Skip the third step, Scopes, by clicking Save and Continue.
In the last step, OAuth Client ID, select Website application for the Application Type field and type My Flectra Database for the Name.
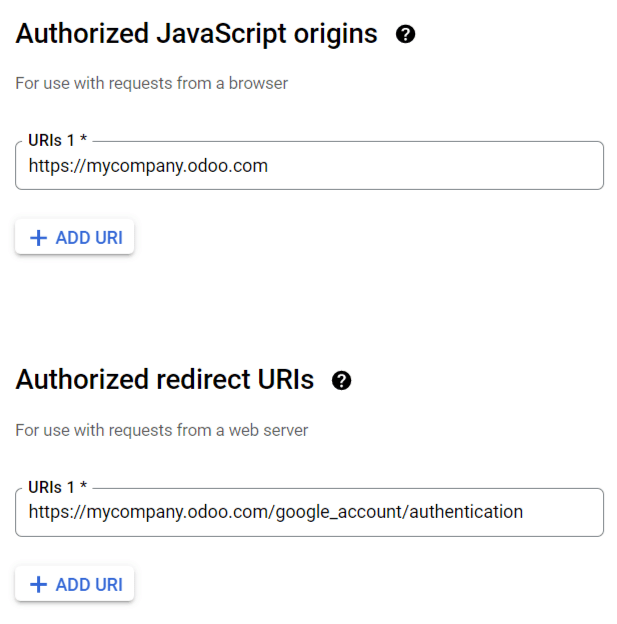
Under the Authorized JavaScript Origins section, click + Add URI and type your company’s Flectra URL address.
Under the Authorized redirect URIs section, click + Add URI and type your company’s Flectra URL address followed by /google_account/authentication. Finally, click Create and Done.
After successfully creating a new API project, enabling the Google Calendar API, and generating the Google Calendar API credentials, you should now have a Client ID and Client Secret.
Client ID & Client Secret
The Client ID and the Client Secret are both needed to connect Google Calendar to Flectra. Find the Client ID and the Client Secret by opening the Google Cloud Platform navigation menu and going to .
Next, locate the credentials you just created for the Google Calendar API. Then, click on Edit OAuth Client (the pencil icon). The page will redirect to the edit page, where you can view the Client ID and the Client Secret.

Setup in Flectra
Once the Client ID and the Client Secret are located, open the Flectra database and go to . Check the box next to Google Calendar.
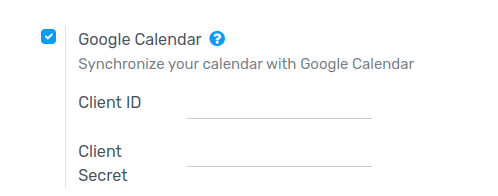
Next, copy and paste the Client ID and the Client Secret from the Google Calendar API Credentials page into their respective fields below the Google Calendar checkbox. Then, click Save.
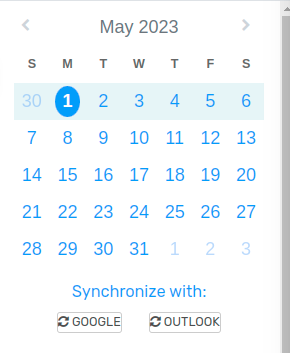
Finally, open the Calendar module in Flectra and click on the Google sync button to sync Google Calendar with Flectra.
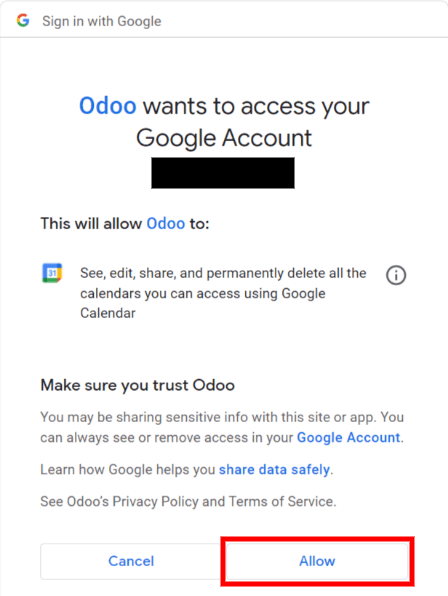
Note
The first time you sync your Google Calendar with Flectra, the page will redirect to your Google Account. Click OK and Allow to authorize Flectra to access Google Calendar.
Now, Flectra Calendar is successfully synced with Google Calendar!