Target an audience
Delivering marketing campaigns to the right audience is paramount when trying to grow a business. The Flectra Marketing Automation application helps marketers to do just that by providing filtering tools, that can be as simple or as complex as necessary, to reach the right customers at the right time.
Work with target filters
When configuring the filters on a marketing campaign, there are some options that have an arrow icon beside them. The arrow signifies that the filter has more refined parameters within it.
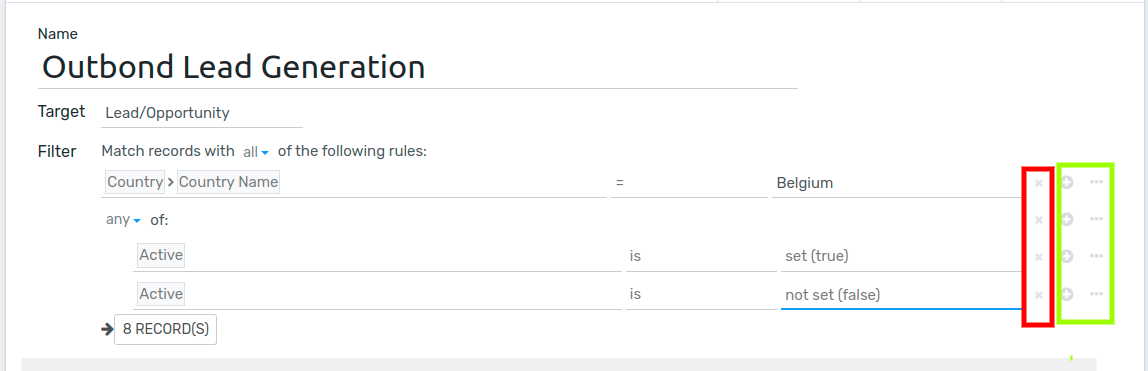
Filters can be extended by adding branches and nodes. A node adds another filtering parameter to a group of targeting conditions (e.g. a new line), and a branch creates a narrowly refined cluster of parameters, allowing filters to be grouped with Any or All statements.
Every time a new branch is created, there are two options:
Either the records can match ALL criteria for the upcoming rules (an AND statement where all criteria must match).
Or, the records can match ANY criteria for the upcoming rules (an OR statement where only one of the criteria must match).
To change between these two options, simply click the drop-down arrow icon in the green box and select Any or All.
To add a node, click on the + (plus sign icon) and to add another branch click on the … (ellipses icon). To exclude a node (or a branch), click on x (delete).
Use cases
The following scenarios below outline different combinations of filters a marketing campaign might commonly use.
Scenario #1: Narrow the target down to new opportunities in the pipeline
While in Edit mode on a campaign template form, select the Target field, and click Search More from the drop-down menu. Then, search for Lead/Opportunity and select it.
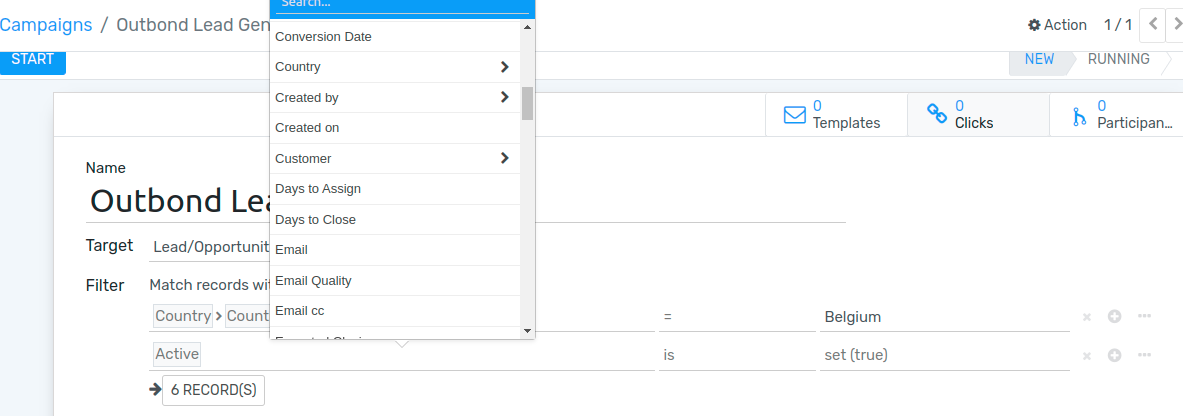
Next, click Add Filter in the Filter field. Click on the default ID filter option in the first portion of the filter equation. Doing so reveals a drop-down menu full of filter options. From this drop-down, scroll down (or search for) Type.
Keep the second portion of the filter equation on the default = (equal sign).
Then, change the third (and final) portion of the filter equation from Lead to Opportunity. The number of Records that fit this specific filter equation will change as the equation is customized.
Add another node to this filter by clicking the + (plus sign) to the right of the equation.
With “new” opportunities being the target of this filter, the second node will focus on only locating opportunities that are in the New stage of the pipeline. To do that, select the default ID from the first portion of the second filter equation, and scroll down (or search for) Stage from the field drop-down menu.
Once again, leave the second portion of the filter equation on = (equal sign).
Lastly, highlight the default value in the third (and final) portion of the second filter equation and type in New. With that completed, Flectra will only target opportunities that are in the “New” stage of the pipeline.

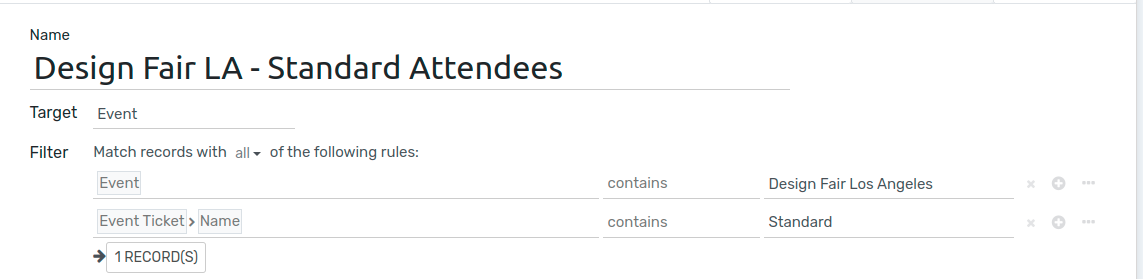
Scenario #2: Narrow the target down to the event attendees that purchased a specific ticket
While in Edit mode on a campaign template form, select the Target field, and click Search More from the drop-down menu. Then, scroll down (or search for) Event and select it.
Next, click Add Filter in the Filter field. Click on the default ID filter option in the first portion of the filter equation. Doing so reveals a drop-down menu full of filter options. From this drop-down, scroll down (or search for) Event.
Click the the default = (equal sign) in the second portion of the filter equation. This reveals a drop-down menu. On this menu, select contains.
In the third (and final) empty portion of the filter equation, type in the name of the event(s) that you would like Flectra to consider for this campaign filter.
Add another node to this filter by clicking the + (plus sign) to the right of the equation.
The second node will focus on targeting this campaign to attendees who purchase a specific type of ticket to the aforementioned event(s) in the first filter equation. To do that, select the default ID from the first portion of the second filter equation, and scroll down (or search for) Event Ticket from the field drop-down menu. Then, in that same drop-down menu, select Name.
Once again, click the the default = (equal sign) in the second portion of the filter equation, and select contains.
Lastly, in the third (and final) portion of the second filter equation, which will be blank, type in the name of the ticket type that should be used for the filter. In this case, Standard is the name of the event ticket type for this sample filter.