Change language
Flectra provides you with the option to manage Flectra in different languages, and each user can use Flectra in his own language .
Load your desired language
The first thing to do is to load your desired language on your Flectra instance.
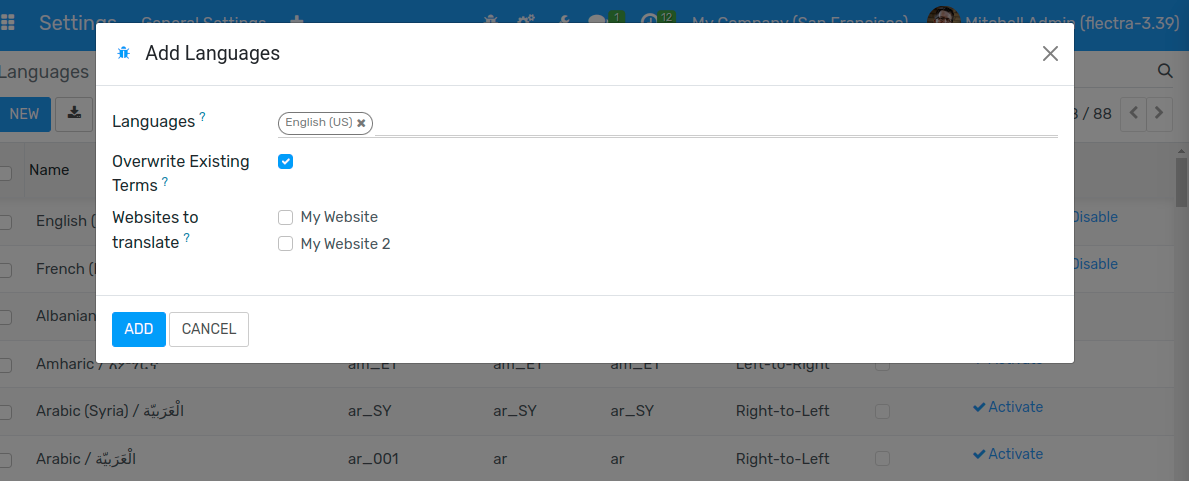
From the general dashboard click on the Settings app; on the top left of the page select , select a language to install and click on LOAD.

Note
If you check the “Websites to translate” checkbox you will have the option to change the navigation language on your website.
Change your language
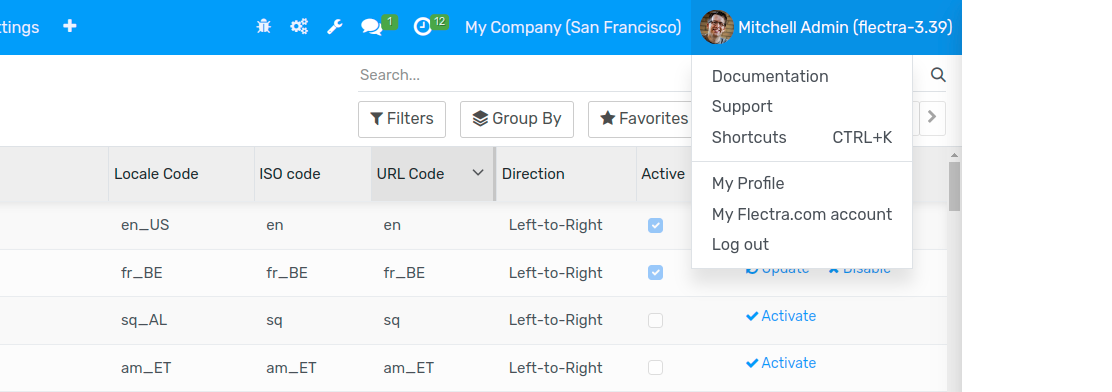
You can change the language to the installed language by going to the drop-down menu at the top right side of the screen, choose My Profile.

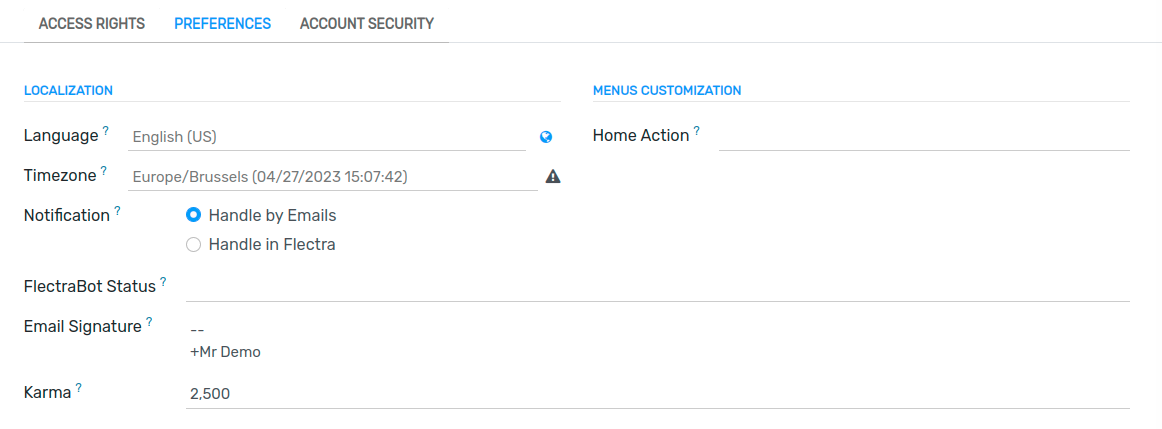
Then change the Language setting to your installed language and click SAVE.

Open a new menu to view the changes.
Change another user’s language
Flectra also gives you the possibility for each user to choose his preferred language.
To change the language for a different user, choose from the Settings app. Here you have a list of all users and you can choose the user who you’d like to change the language for. Select the user and click on Edit in the top left corner. Under Preferences you can change the Language to any previously installed language and click SAVE.

See also