Chapter 8: Relations Between Models
The previous chapter covered the creation of custom views for a model containing basic fields. However, in any real business scenario we need more than one model. Moreover, links between models are necessary. One can easily imagine one model containing the customers and another one containing the list of users. You might need to refer to a customer or a user on any existing business model.
In our real estate module, we want the following information for a property:
the customer who bought the property
the real restate agent who sold the property
the property type: house, apartment, penthouse, castle…
a list of tags characterizing the property: cozy, renovated…
a list of the offers received
Many2one
Reference: the documentation related to this topic can be found in
Many2one.
Note
Goal: at the end of this section:
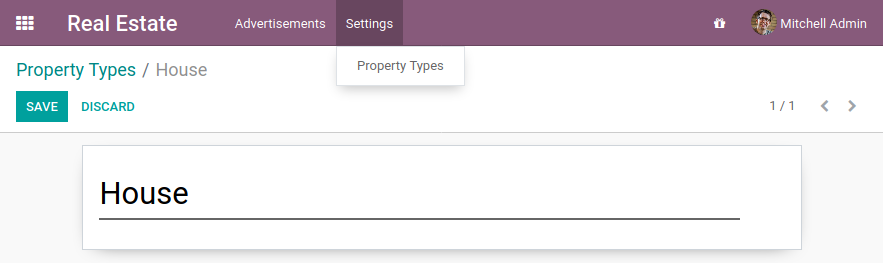
a new
estate.property.typemodel should be created with the corresponding menu, action and views.
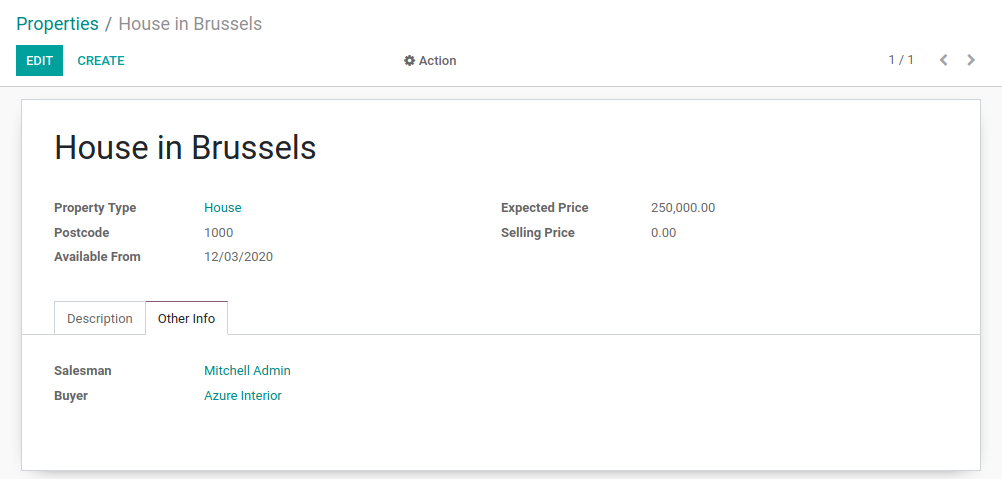
three Many2one fields should be added to the
estate.propertymodel: property type, buyer and seller.
In our real estate module, we want to define the concept of property type. A property type is, for example, a house or an apartment. It is a standard business need to categorize properties according to their type, especially to refine filtering.
A property can have one type, but the same type can be assigned to many properties. This is supported by the many2one concept.
A many2one is a simple link to another object. For example, in order to define a link to the
res.partner in our test model, we can write:
partner_id = fields.Many2one("res.partner", string="Partner")
By convention, many2one fields have the _id suffix. Accessing the data in the partner
can then be easily done with:
print(my_test_object.partner_id.name)
See also
In practice a many2one can be seen as a dropdown list in a form view.
Exercise
Add the Real Estate Property Type table.
Create the
estate.property.typemodel and add the following field:
Field |
Type |
Attributes |
|---|---|---|
name |
Char |
required |
Add the menus as displayed in this section’s Goal
Add the field
property_type_idinto yourestate.propertymodel and its form, tree and search views
This exercise is a good recap of the previous chapters: you need to create a model, set the model, add an action and a menu, and create a view.
Tip: do not forget to import any new Python files in __init__.py, add new data files in
__manifest.py__ or add the access rights ;-)
Once again, restart the server and refresh to see the results!
In the real estate module, there are still two missing pieces of information we want on a property: the buyer and the salesperson. The buyer can be any individual, but on the other hand the salesperson must be an employee of the real estate agency (i.e. an Flectra user).
In Flectra, there are two models which we commonly refer to:
res.partner: a partner is a physical or legal entity. It can be a company, an individual or even a contact address.res.users: the users of the system. Users can be ‘internal’, i.e. they have access to the Flectra backend. Or they can be ‘portal’, i.e. they cannot access the backend, only the frontend (e.g. to access their previous orders in eCommerce).
Exercise
Add the buyer and the salesperson.
Add a buyer and a salesperson to the estate.property model using the two common models
mentioned above. They should be added in a new tab of the form view, as depicted in this section’s Goal.
The default value for the salesperson must be the current user. The buyer should not be copied.
Tip: to get the default value, check the note below or look at an example here.
Note
The object self.env gives access to request parameters and other useful
things:
self.env.crorself._cris the database cursor object; it is used for querying the databaseself.env.uidorself._uidis the current user’s database idself.env.useris the current user’s recordself.env.contextorself._contextis the context dictionaryself.env.ref(xml_id)returns the record corresponding to an XML idself.env[model_name]returns an instance of the given model
Now let’s have a look at other types of links.
Many2many
Reference: the documentation related to this topic can be found in
Many2many.
Note
Goal: at the end of this section:
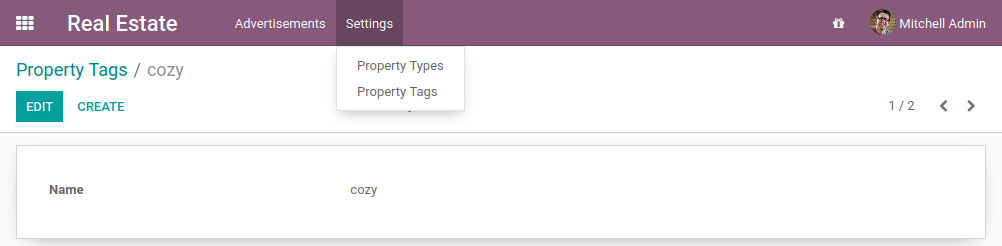
a new
estate.property.tagmodel should be created with the corresponding menu and action.
tags should be added to the
estate.propertymodel:
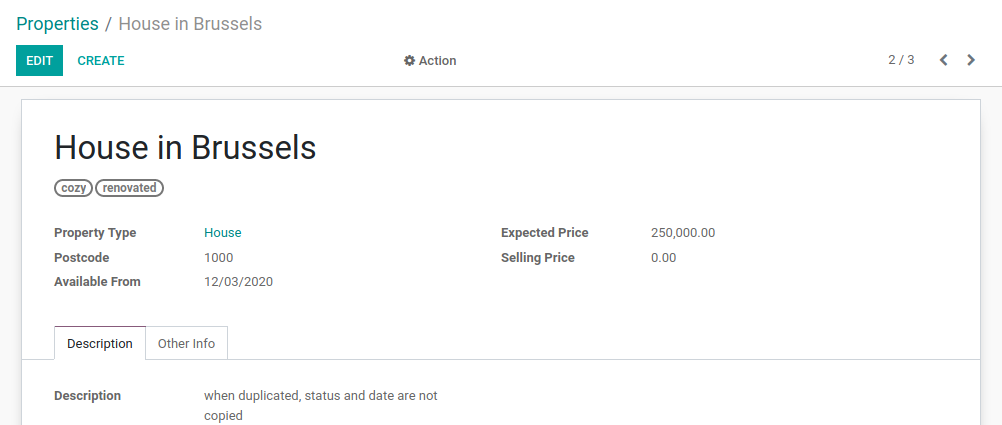
In our real estate module, we want to define the concept of property tags. A property tag is, for example, a property which is ‘cozy’ or ‘renovated’.
A property can have many tags and a tag can be assigned to many properties. This is supported by the many2many concept.
A many2many is a bidirectional multiple relationship: any record on one side can be related to any
number of records on the other side. For example, in order to define a link to the
account.tax model on our test model, we can write:
tax_ids = fields.Many2many("account.tax", string="Taxes")
By convention, many2many fields have the _ids suffix. This means that several taxes can be
added to our test model. It behaves as a list of records, meaning that accessing the data must be
done in a loop:
for tax in my_test_object.tax_ids:
    print(tax.name)
A list of records is known as a recordset, i.e. an ordered collection of records. It supports
standard Python operations on collections, such as len() and iter(), plus extra set
operations like recs1 | recs2.
Exercise
Add the Real Estate Property Tag table.
Create the
estate.property.tagmodel and add the following field:
Field |
Type |
Attributes |
|---|---|---|
name |
Char |
required |
Add the menus as displayed in this section’s Goal
Add the field
tag_idsto yourestate.propertymodel and in its form and tree views
Tip: in the view, use the widget="many2many_tags" attribute as demonstrated
here.
The widget attribute will be explained in detail in a later chapter of the training.
For now, you can try to adding and removing it and see the result ;-)
One2many
Reference: the documentation related to this topic can be found in
One2many.
Note
Goal: at the end of this section:
a new
estate.property.offermodel should be created with the corresponding form and tree view.offers should be added to the
estate.propertymodel:
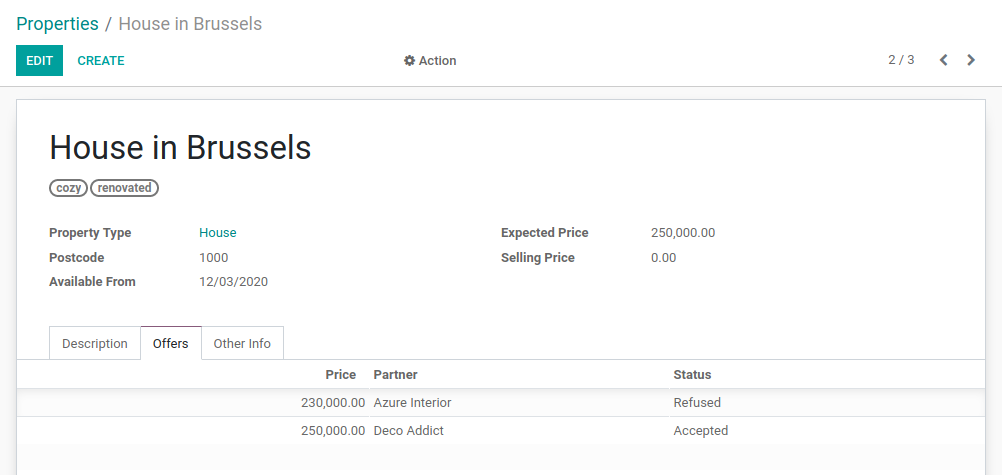
In our real estate module, we want to define the concept of property offers. A property offer is an amount a potential buyer offers to the seller. The offer can be lower or higher than the expected price.
An offer applies to one property, but the same property can have many offers. The concept of many2one appears once again. However, in this case we want to display the list of offers for a given property so we will use the one2many concept.
A one2many is the inverse of a many2one. For example, we defined
on our test model a link to the res.partner model thanks to the field partner_id.
We can define the inverse relation, i.e. the list of test models linked to our partner:
test_ids = fields.One2many("test.model", "partner_id", string="Tests")
The first parameter is called the comodel and the second parameter is the field we want to
inverse.
By convention, one2many fields have the _ids suffix. They behave as a list of records, meaning
that accessing the data must be done in a loop:
for test in partner.test_ids:
    print(test.name)
Danger
Because a One2many is a virtual relationship,
there must be a Many2one field defined in the comodel.
Exercise
Add the Real Estate Property Offer table.
Create the
estate.property.offermodel and add the following fields:
Field |
Type |
Attributes |
Values |
|---|---|---|---|
price |
Float |
||
status |
Selection |
no copy |
Accepted, Refused |
partner_id |
Many2one ( |
required |
|
property_id |
Many2one ( |
required |
Create a tree view and a form view with the
price,partner_idandstatusfields. No need to create an action or a menu.Add the field
offer_idsto yourestate.propertymodel and in its form view as depicted in this section’s Goal.
There are several important things to notice here. First, we don’t need an action or a menu for all models. Some models are intended to be accessed only through another model. This is the case in our exercise: an offer is always accessed through a property.
Second, despite the fact that the property_id field is required, we did not include it in the
views. How does Flectra know which property our offer is linked to? Well that’s part of the
magic of using the Flectra framework: sometimes things are defined implicitly. When we create
a record through a one2many field, the corresponding many2one is populated automatically
for convenience.
Still alive? This chapter is definitely not the easiest one. It introduced a couple of new concepts while relying on everything that was introduced before. The next chapter will be lighter, don’t worry ;-)